Lace knitting adds elegance and sophistication to your projects. Whether you've been knitting for years or are just starting out, this beginner's guide to lace knitting will help you create beautiful and intricate designs.
In this article, we will walk you through the basics of lace knitting, from choosing the right yarn and needles to reading lace patterns and fixing common mistakes. We'll also share some tips and tricks to make your lace knitting experience more enjoyable and successful.
You deserve to make jaw dropping knits, and you can! Get ready to experience that "damn, I made this!" feeling. Grab your needles and let's get started on your journey to becoming a lace knitting pro.
Ready for a lacy Spring?
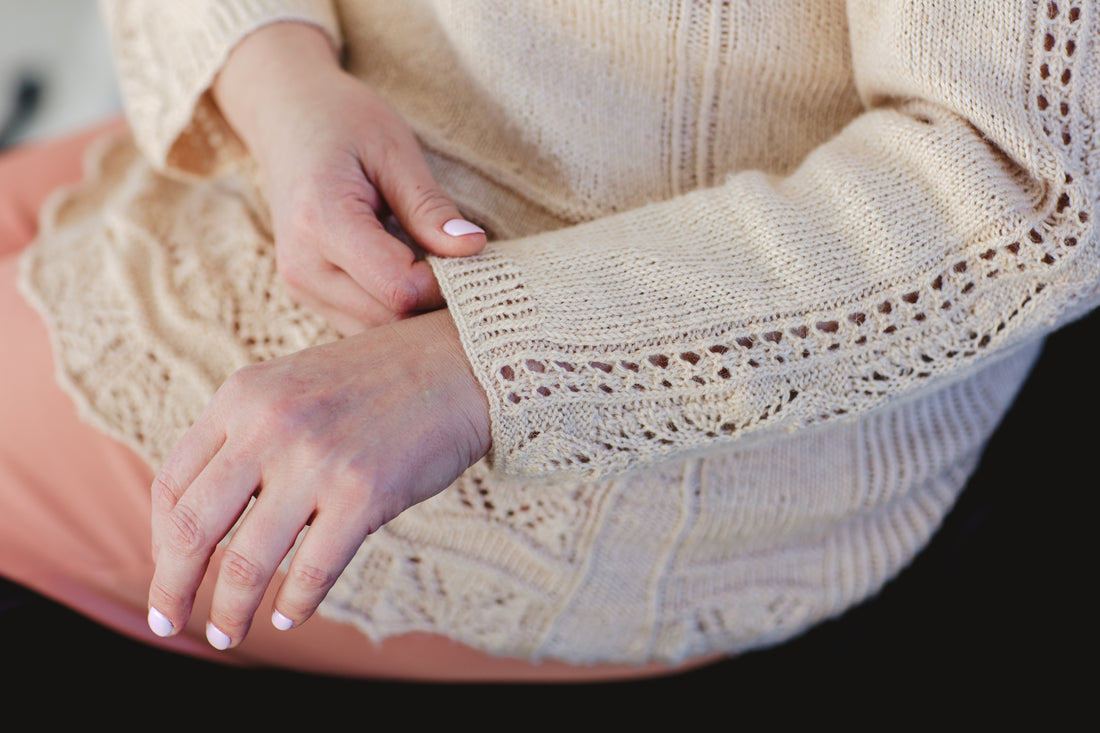
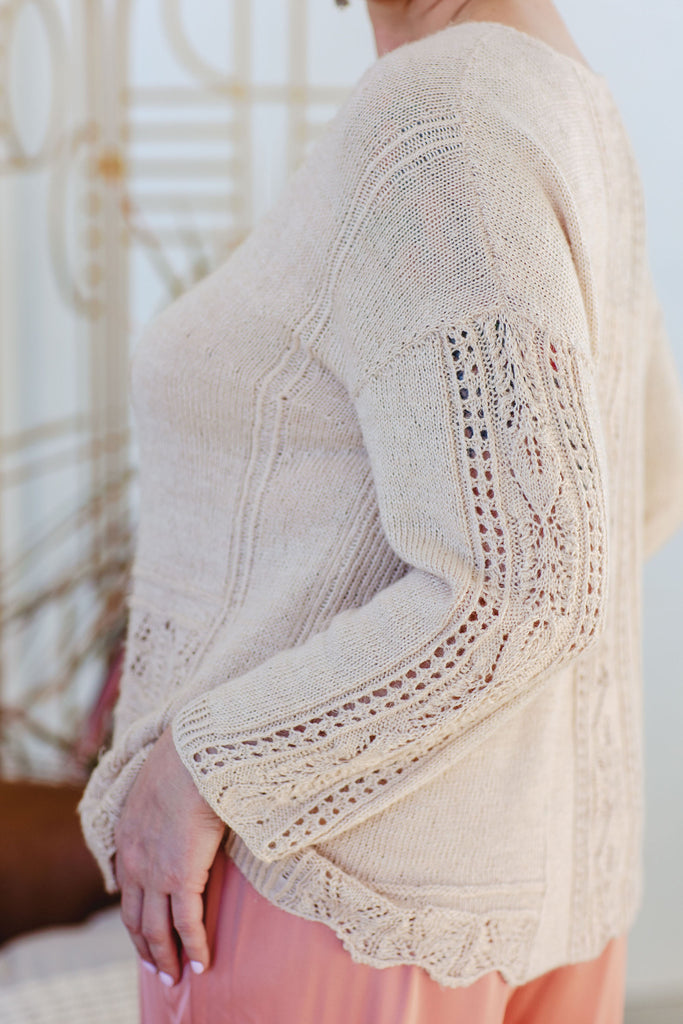
Among Petals (shown here) is a long sleeved, dropped shoulder tee with intricate lace details.
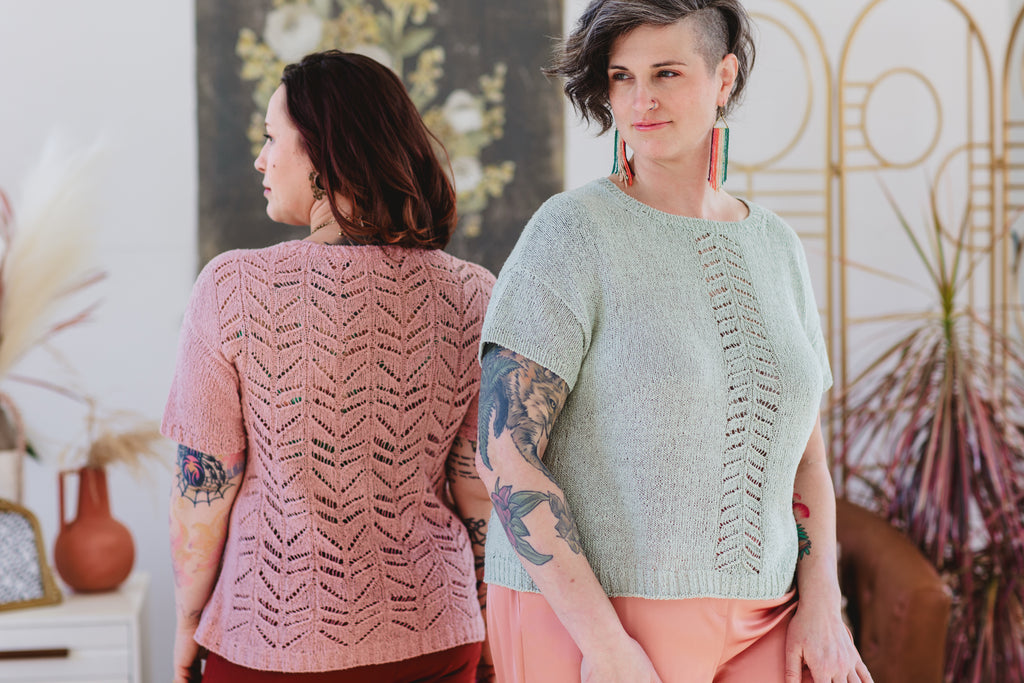
Kanno's Resistance features a chunkier lace pattern across the whole back and mirrored in the front.
Both patterns work all shaping in stockinette sections for an easier lace experience.
Understanding lace knitting patterns
Lace knitting patterns may seem intimidating at first, but once you understand the basics, it's all just knitting! Lace patterns are created by combining a series of increases and decreases. These patterns often incorporate yarn overs, which create the holes and spaces characteristic of lace knitting. Most common lace stitches in sweaters will have the same number of stitches in each row of the lace pattern. In some lace stitches, the number of stitches may change from row to row. This second scenario is used often in shawls or circular yoke sweaters to incorporate shaping into the lace design.
When working with lace patterns, it's important to pay attention to stitch counts, as mistakes will add up quickly and can throw off the entire design. Reading and understanding the pattern before you begin is crucial to ensure a successful project. Take your time to familiarize yourself with the abbreviations and symbols used in lace knitting patterns, as they will guide you through the process.
It's also worth noting that lace patterns may require different techniques, such as working on both the right and wrong sides of the fabric. This adds an extra level of complexity but also enables you to create more intricate and detailed designs.
Our number one recommendation before beginning a garment is to swatch and swatch big. This is especially true for a garment featuring lace. Make a generous swatch of the lace stitch and practice it as many times as you need to feel comfortable. This way your garment will feature tidy, evenly worked lace and you'll have confidence in how to work the pattern.
Simple lace, big impact
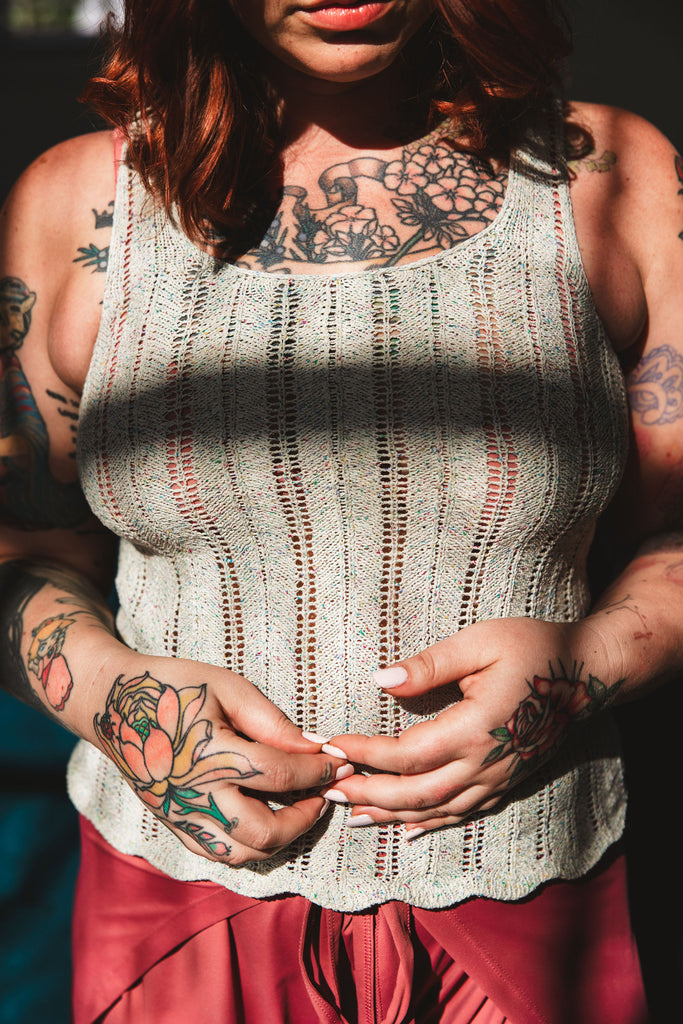
The Tori Tank is a great first lace garment. This chevron stitch is simple with only two paired increases and decreases that align each round.
This simple yet elegant base layer was designed to add the perfect flirty layer under your handknit sweaters
Essential tools and materials for lace knitting
First and foremost, let's talk needles. Lace knitting is often done with smaller needle sizes to create delicate stitches and intricate patterns. Circular needles are a popular choice for lace knitting as they can accommodate a large number of stitches and are more comfortable to work with for larger projects. If you've never worked with "sharps" before, they are particularly helpful for lace knitting. Sharps are needles with a pointier (or sharper) tip. It can be easier to work decreases with these sharper tips.
In addition to needles, you'll also need a range of stitch markers. These markers can be used to keep track of pattern repeats and make it easier to read and follow the lace pattern. You may want to use many more stitch markers than the pattern recommends to track your lace repeats. This works great, especially if you have distinct markers to indicate the side seams, BOR, or raglan seams in your garment. Stitch markers come in various sizes and shapes, so choose ones that are easy to see and won't snag your yarn. We love simple seamless ring markers the most.
Bonus tool: row counter. This small device can be a luxurious stand alone piece, attached to your knitting needles, or worn as a bracelet and helps you keep track of the number of rows or pattern repeats. A row counter is especially useful when working on larger lace projects or when you need to put your knitting down and pick it up later.
Finally, let's talk about yarn and other materials. Lace knitting has traditionally been done with fine, lightweight yarns that have excellent stitch definition. Lace weight or fingering weight give your stitches a delicate and airy look. Natural fibers such as merino wool, silk, or alpaca drape beautifully and showcase the intricate patterns. Less traditional yarns for lace knitting like tweedy, chunky wool also have a place as they can showcase lace stitches in a unique way.
If you're substituting yarn for a garment that features lace, as always, we recommend focusing on the features of the original yarn used and matching those properties as best you can.
Tips for reading lace knitting charts
Lace knitting charts are visual representations of the lace patterns and are an invaluable tool for following complex designs. While some lace knitting patterns may include written instructions, charts are often more concise and easier to follow once you understand the symbols and abbreviations used. You'll find that One Wild Designs patterns will typically feature both written instructions as well as a chart for lace stitches.
Reading a lace knitting chart may seem daunting at first, but with a little practice it becomes second nature. Each square on the chart represents a stitch or a group of stitches, and the symbols within the square indicate the specific stitch to be worked. The chart is typically read from right to left on the right side rows and from left to right on the wrong side rows. That means if you are working in the round, you'll read the chart from right to left on every round.
One useful tip when working with lace knitting charts is to use stitch markers to mark the beginning and end of each repeat. This makes it easier to keep track of where you are in the pattern and helps prevent mistakes. It's also a good idea to place a removable marker at the center stitch of the chart, especially when working on larger lace projects with multiple repeats.
To make reading charts even easier, consider using a magnetic chart keeper or a transparent overlay. These tools allow you to keep your place on the chart and easily move along as you work through the pattern. Many mistakes in lace knitting happen because you've lost your place between picking up and putting down your work (or even just looking up for a moment!). Mastering lace knitting really means building out systems that work for you to track your work!
Starting with simple lace stitches
If you're new to lace knitting, it's best to start with simple lace stitches to practice the techniques before tackling more complex patterns. One of the easiest lace stitches for beginners is the yarn over (yo) stitch.
To work a yarn over stitch, simply wrap the yarn around the needle from front to back before knitting the next stitch. This creates an extra stitch and an eyelet hole in your fabric. Yarn overs are often paired with decreases, such as knit two together (k2tog) or slip, slip, knit (ssk), to create the lacy patterns.
A very simple lace mesh can be created with an even number of stitches, on right side rows work [yo, k2tog] and on wrong side rows purl across.
Remember to keep your tension even and avoid pulling the stitches too tight. Choose patterns with basic lace stitches until you feel comfortable before moving on to more challenging variations.
Lifelines
Lifelines are an invaluable tool in lace knitting. They act as safety nets, allowing you to easily rip back to a specific row if you make a mistake. To insert a lifeline, thread a contrasting color yarn through the stitches on a specific row using a tapestry needle.
If you're new to lace knitting, I recommend using lifelines every few rows, or after completing each whole repeat of the lace pattern. This will save you from having to unravel your entire project if an error occurs, and for newer lace knitters those errors will occur! Lifelines provide peace of mind and make it easier to fix mistakes without losing your progress. You can add a lifeline after a row is off of your needles, but that is much trickier especially in lace knitting. Adding lifelines as you work is a simpler and more accurate way to go.
Blocking
Blocking is a crucial step in lace knitting that transforms your finished project from a crumpled mess to a stunning piece of art. Blocking involves wetting your lace project and gently shaping it to the desired dimensions.
To block your lace project, soak it in lukewarm water for about 20 minutes. Gently squeeze out the excess water and lay the project flat on a blocking mat or towel. Use rustproof pins to stretch and shape the fabric according to the lace pattern.
Allow your project to dry completely before unpinning. Blocking helps open up the lace stitches, evens out the fabric, and gives your project a professional finish.
Seamless garments which feature lace sections can not be blocked as precisely. Make sure you block your swatch in the same way that you will block your finished garment to get a true idea of how the lace stitch will react to blocking. Different fibers and blends will behave differently and some may obscure the lace stitch more than others.
Jen sits on a faux fur ottoman wearing an elegant slip dress, grey suede heels, and a creamy lace sweater adorned with pearls.

Fixing mistakes
I pride myself in my ability to fix lace. In fact, this past Rhinebeck season I found myself hunched over bestie's lace knitting, pulling back a whole fussy lace repeat, and, eventually, repairing the mistakes so you could never tell.
The point is, mistakes happen, even to experienced knitters. The key to successful lace knitting is knowing how to fix mistakes without unraveling your entire project. Here are a few common mistakes and how to fix them:
-
Dropped Stitch: If you notice a dropped stitch in your lace pattern, immediately place a stitch marker or safety pin below it to prevent further unraveling. Use a crochet hook or knitting needle to pick up the dropped stitch and work it back up to the needle.
-
Mistaken Decrease or Increase: If you accidentally worked a decrease or increase in the wrong place, carefully unravel the stitches above the mistake until you reach the incorrect stitch. Place the stitches back on the left-hand needle in the correct order and rework the decrease or increase.
- Mistakes in Larger Sections: Sometimes one mistaken increase or decrease sets off a chain of mistakes in a certain repeat of your lace stitch. If you've been using lifelines, you can drop several stitches at once back to the beginning of the incorrect repeat. Using DPNs, rework this section until you've caught back up to your current row. If you haven't placed a lifeline before, look for the beginning of the lace repeat and carefully thread a lifeline through the right leg of each stitch in the repeat before dropping down. Dropping multiple stitches of lace knitting without a lifeline is incredibly risky.
Remember, lace knitting is forgiving, and small mistakes can often be camouflaged within the intricate lace patterns. Embrace the imperfections and enjoy the process of creating beautiful lace designs. Your finished work doesn't have to be perfect to be breathtaking.
You're ready to cast on a lace sweater
A lace sweater is a stunning addition to your wardrobe and can be dressed up or down depending on the occasion. I believe every knitter deserves to have one in their handmade closet. The best way to master knitting sweaters with lace is to take the plunge and try one! The One Wild pattern library features many different lace garments that beginner and master knitters will enjoy. Let yourself luxuriate in a long knit for your first lace project. Keep good notes and plan some breaks to work on simpler projects. Let yourself be human and enjoy the learning process!